Get hands-on with RADAR-base #
RADAR-base is an open-source platform to leverage data from wearable devices and mobile technologies. The main focus of RADAR-base is a seamless integration of data streams from various wearable devices to collect sensor data in real-time and store, manage and share the collected data with researchers for retrospective analysis.
This article aims to provide high-level information on how to use RADAR-base in your studies, including a hands-on guide to using the pRMT app. For technical users, to understand the platform architecture and components, please read our getting started page.
Open source #
The RADAR-base platform is provided under an Apache 2 open-source license. This means that you are free to access and use all functionalities of the platform on a self-service basis without incurring any licensing costs from a software provider.
Study design and the choice of devices #
To conduct a remote monitoring study using RADAR-Base, you need an installation of the RADAR-base platform either in-house or on-cloud, integration of a selection of devices you would like to use for your study and a study protocol. Once these are available, you can start enrolling participants with the help of our study management system called Management Portal.
Study management system #
Management Portal (MP) is a web application to manage studies, participants and devices or applications used by participants. It provides role-based access control (RBAC) levels for the users such as system-admin, project-admin, participant etc. This means that data access is granted or restricted based on the roles and projects a user is assigned to. This ensures that only authorized personnel can access the research data. The first step in managing a study/trial with RADAR-base is to create a Project. All users, participants, devices and data collected are scoped by the project.
A participant is represented as a Subject in RADAR-base, and any data source that sends the data to the platform is referred to as a Source, e.g. a wearable device or a mobile app. To allow secure data transmission, RADAR-Base allows only the known subjects to send data from known devices or applications to the platform.
You will find instructions on how to install the pRMT application on your Android phone and enroll one or more participants in a study.
STEP 1: Install RADAR-base platform #
RADAR-Base platform is distributed as an orchestrated stack with associated scripts and configuration files to enable easy installation. Please follow the installation guide to set up your own instance of RADAR-base platform on your preferred infrastructure. If you need support with setting up RADAR-base for your studies, please contact The Hyve.
Step 2. Download and Install RADAR-Base pRMT from the Android Play Store. #

Go to the Play Store on your Android phone and search for “RADAR passive RMT”, and install the application. Once installed, you will see the “Scan QR code” screen on the app.
Step 3. Login into Management Portal. #
- Once you have a successful installation of the RADAR-base platform, you can access the Management Portal of the platform at https://<your-domain-name>/managementportal
STEP 4. Create a project and assign source-type(s) #
The next step is to create a project in the Management Portal and assign users and source types. Please visit the user guide create project and assigning a source-type.
Step 5. Participant on-boarding #
The participant onboarding process is quite easy and can be done with a few clicks and by scanning a QR code generated by the system.


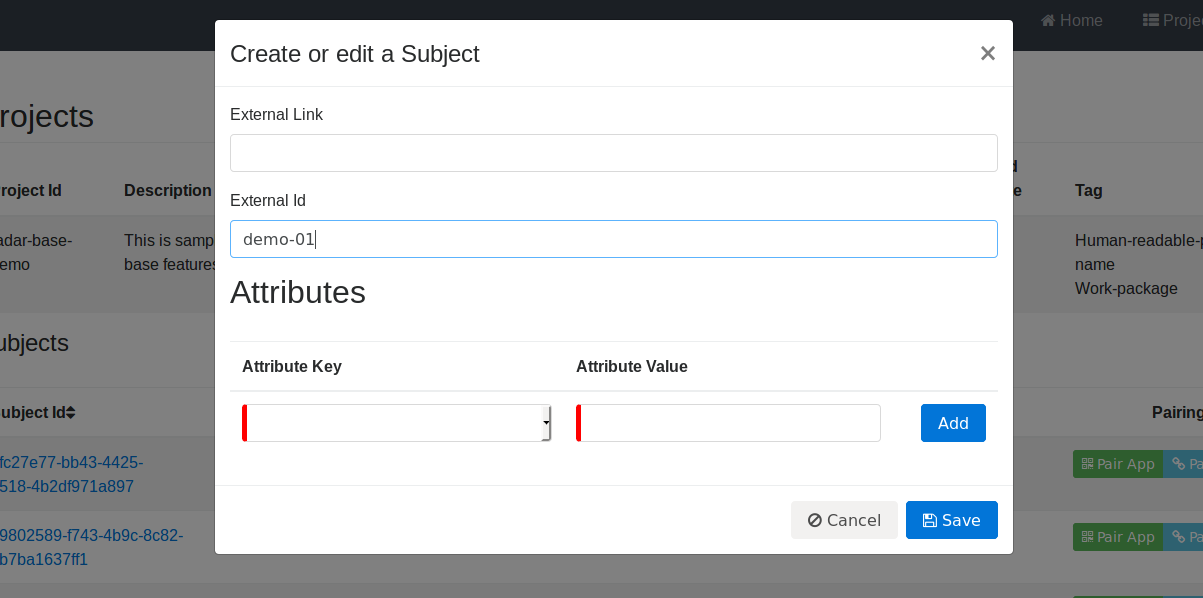
- To start with the enrollment, a system admin/project admin has to create a new subject to add a new participant to the study. Click on Create a new Subject on your study view.
- By default, you don’t have to enter any details here. However, we recommend you mention a unique External id (ideally one that refers to an identifier from an external system, such as identifiers from your local user-management system) to easily identify your subject from the others. Click on Save to create the subject.
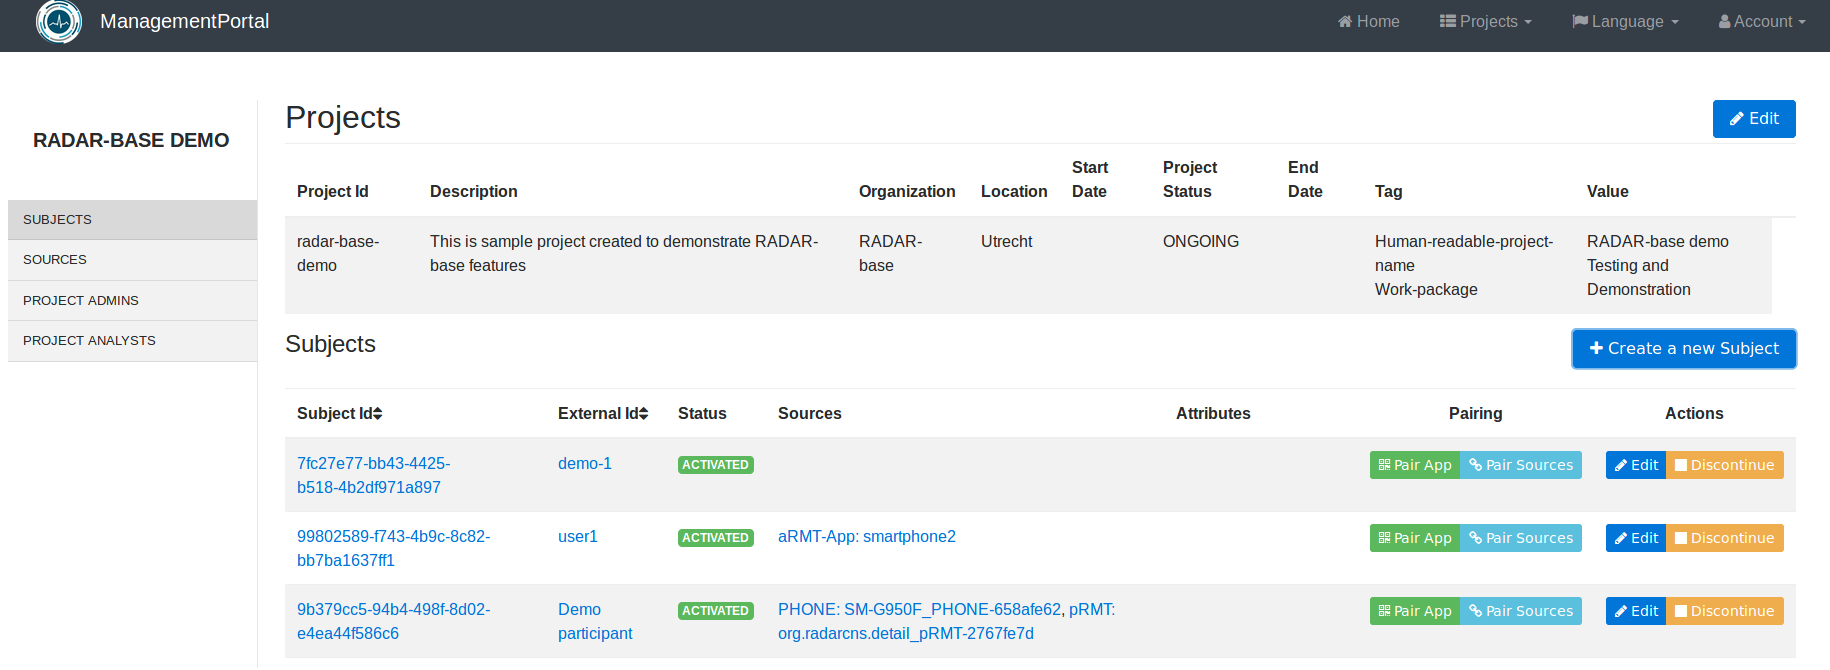
- You will see a new subject created which displays your external id.
- (Optional) Add additional devices like Empatica E4 to the participant. See Appendix I.
Step 6. Generate a QR code for your participant #
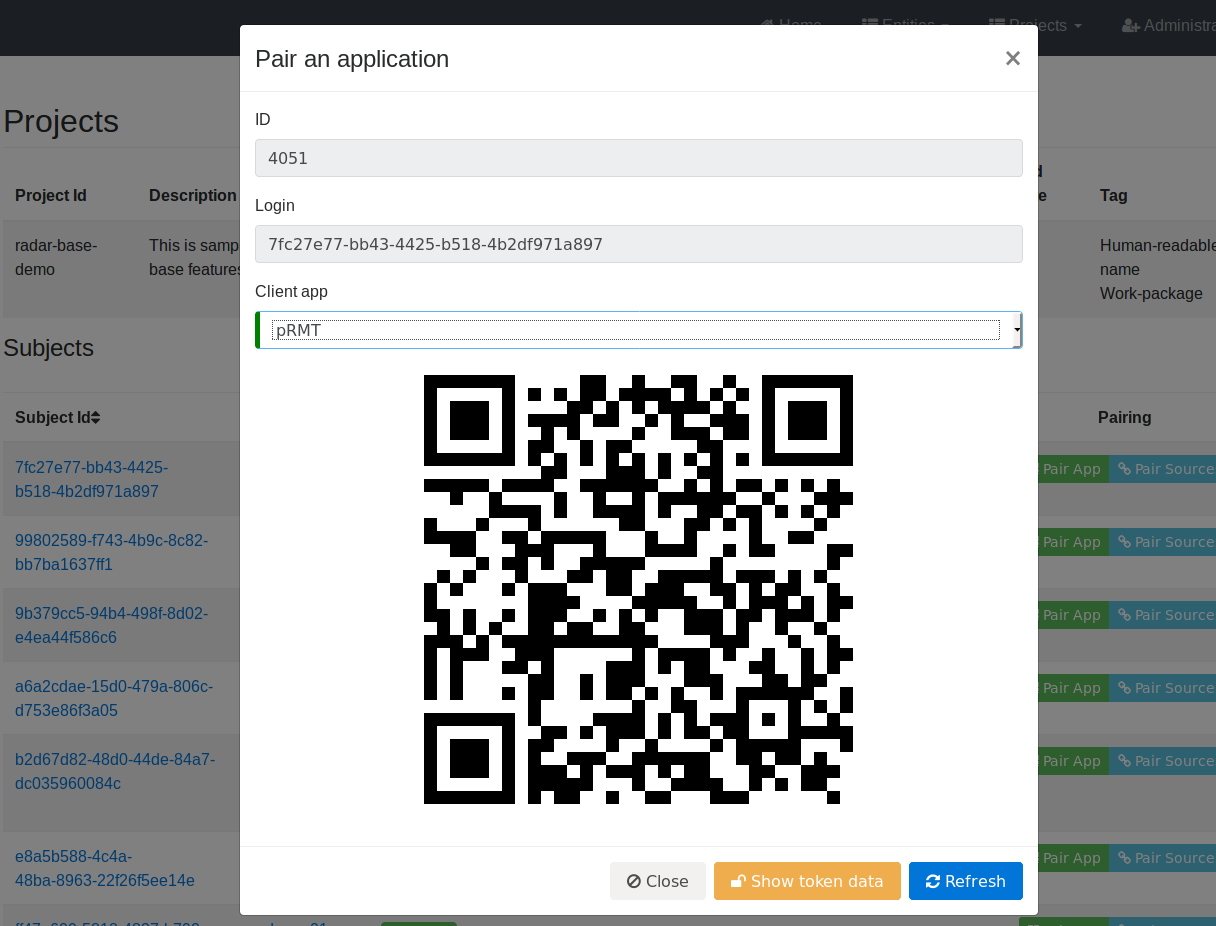
- Click on Pair App on the subject you created.
- You will see a pop-up. From the Client app drop-down, choose pRMT. Then you will see a QR code generated for you.
Step 7. Scan QR code from pRMT app and provide permissions #
- Open the pRMT app you installed on your phone and click on Scan QR Code. Then scan the QR code generated in the system.
- Allow the application to take pictures and video, which will allow the application to scan the QR for you, read and accept the privacy policy, and then allow the application to manage the collection of data. Once done, you will see your phone connected to the platform.
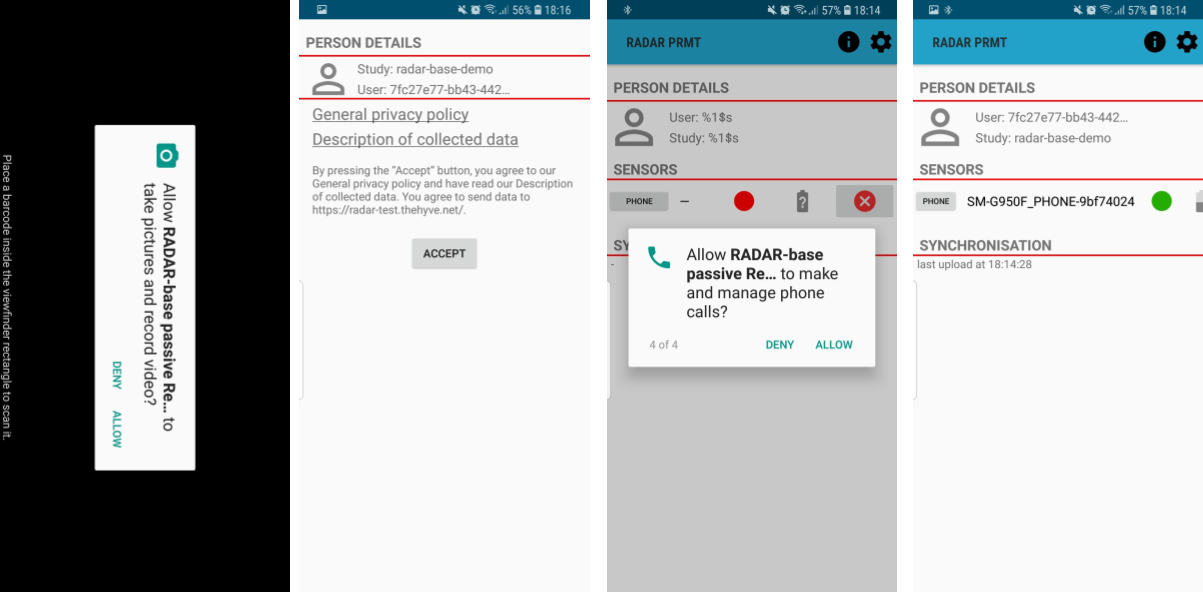 This will enable RADAR-base to collect sensor data from your Android phone.
Appendix I: Adding additional devices to a participant with pRMT #
In addition to the sensor data and application data from your Android phone, you can use one of the supported wearable devices, which sends data to the pRMT application via Bluetooth, such as Empatica E4 or Faros, to try out RADAR-Base. Follow the steps below to add additional devices. The following example shows how to add an Empatica E4 device to a participant.
- Click on SOURCES tab from the left column.

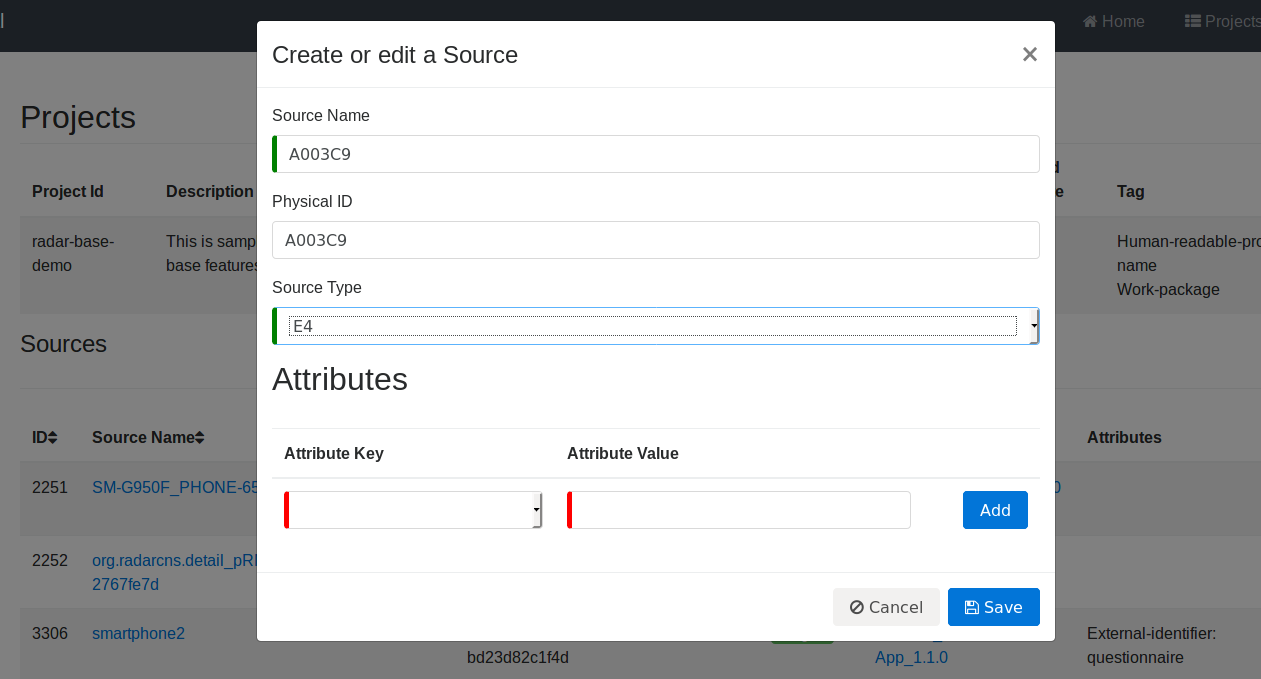
- Then click on Create a new Source and add the serial number of Empatica E4 as the physical ID. The Source name should be a unique value. You can also use the serial number as the source name. Lastly, select E4 as the source-type, then click Save.
- Now you are going to assign this device to the participant. Click on SUBJECTS from the left column to navigate back to the list of participants. Then click on Pair Sources.

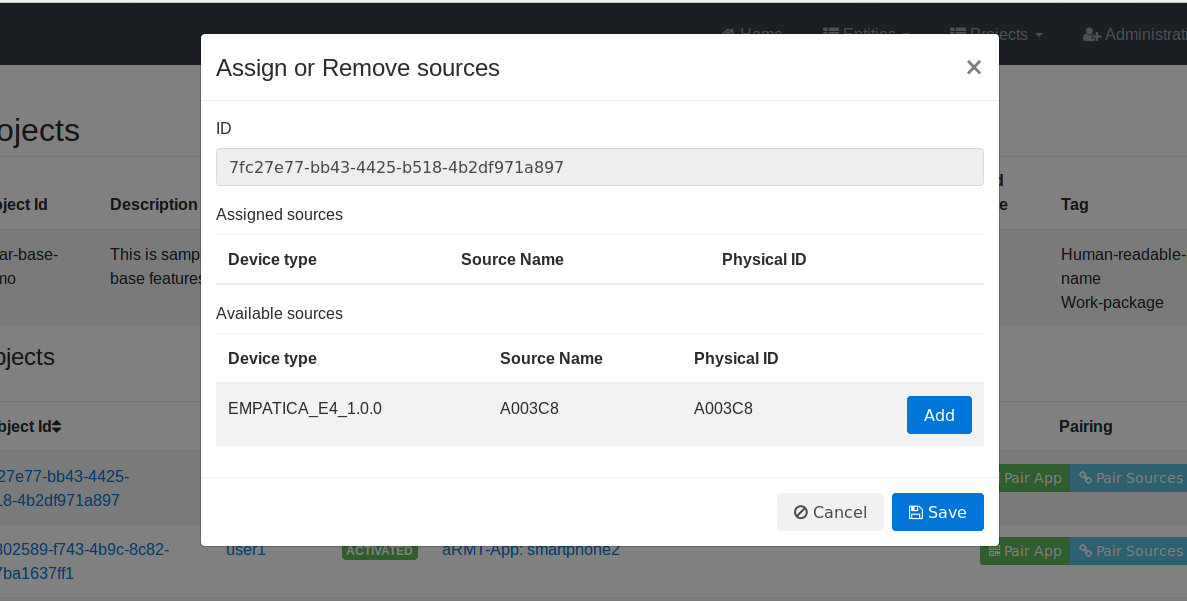
- You will see a pop-up with a list of available sources. Click on the Add button next to the source (with the physical id/ source name you mentioned) and then Save.
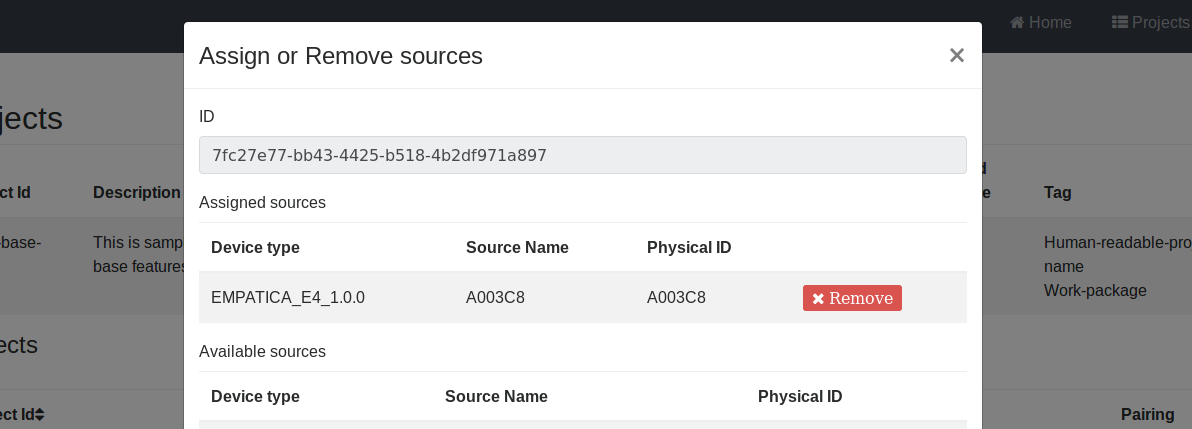
- You will see that it is moved to Assigned sources.
Finally, please follow Step 4 and 5 to generate a QR code and scan it from your Android phone.
You can see the data collected by the app in the output storage of your installation. Please continue to this page to understand how to access the data collected by RADAR-base platform.
The purpose of this article is to enable users to get familiar with the pRMT app and the features it offers. Get in touch if you are interested in RADAR-base or Passive App (pRMT) and want to know more about it or how you can customize the app to fit your custom remote monitoring assessments.
